 |
| The Zodiac Killer Enigma |
You can click the link below to check out the eBook that has the most important aspects of this site along with many other things that you will not find posted anywhere on the internet.
I soon plan to rewrite this article now that all of the work is finished to make it easier to understand for those who may not be familiar with radians (as I was when I first started this years ago). This article will explain what a radian is and how I found them. To begin in brief...
To begin with, a radian is always the same no matter the size of the circle. Think of it as a type of equilateral triangle.

It is not fair to say that when dealing with angular radians, that 57.3 degrees is equal to a radian, even though that is what we are going to say in order to avoid confusion. That would be like saying pi = 3.14 when pi goes on into infinity basically. I only mention this for the people who are high strung about things like this. 1 radian = 180/pi which will always work out to be 57.3 (approximately...) no matter the size of the circle. Look at this example again. All three of these sides are equal length to one another and this will hold true no matter the size of the circle or object. This is called a "theorem" (For those who may not know. Like 2 +2 will always =4. That is a theorem)
I found this app that will let you use a protractor on anything and measure radians. I have more on this later in this article.

Long after I created these models I made a promising discovery. This is one radian.

All of this will make more sense once you read the article and understand how I created the models and the tools I used. You will also see why this is promising. This part of the project is completed. This is why I want to polish it up soon.
As a form of control and making sure this app works right, I used one of the charts you will see in this article that is labeled in degrees and checked it against the 30-degree mark on the chart and protractor. You can see this in the example below.
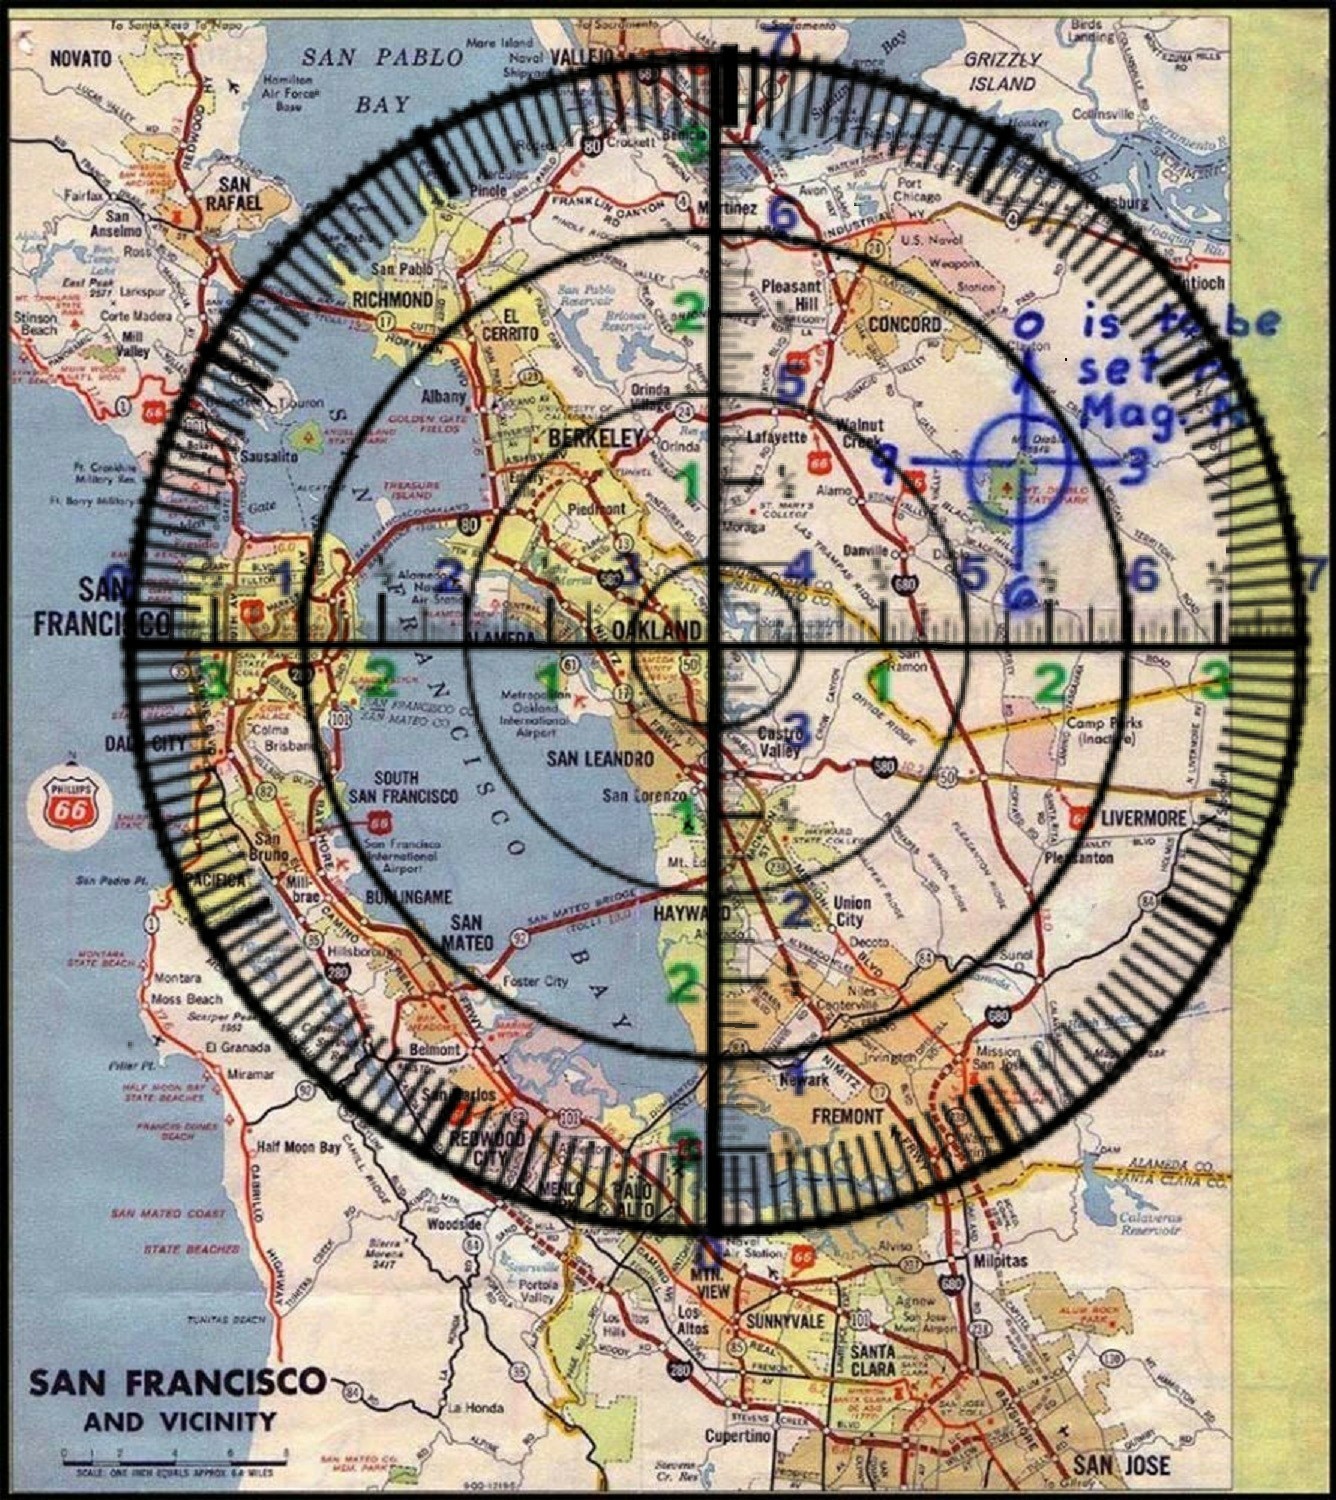
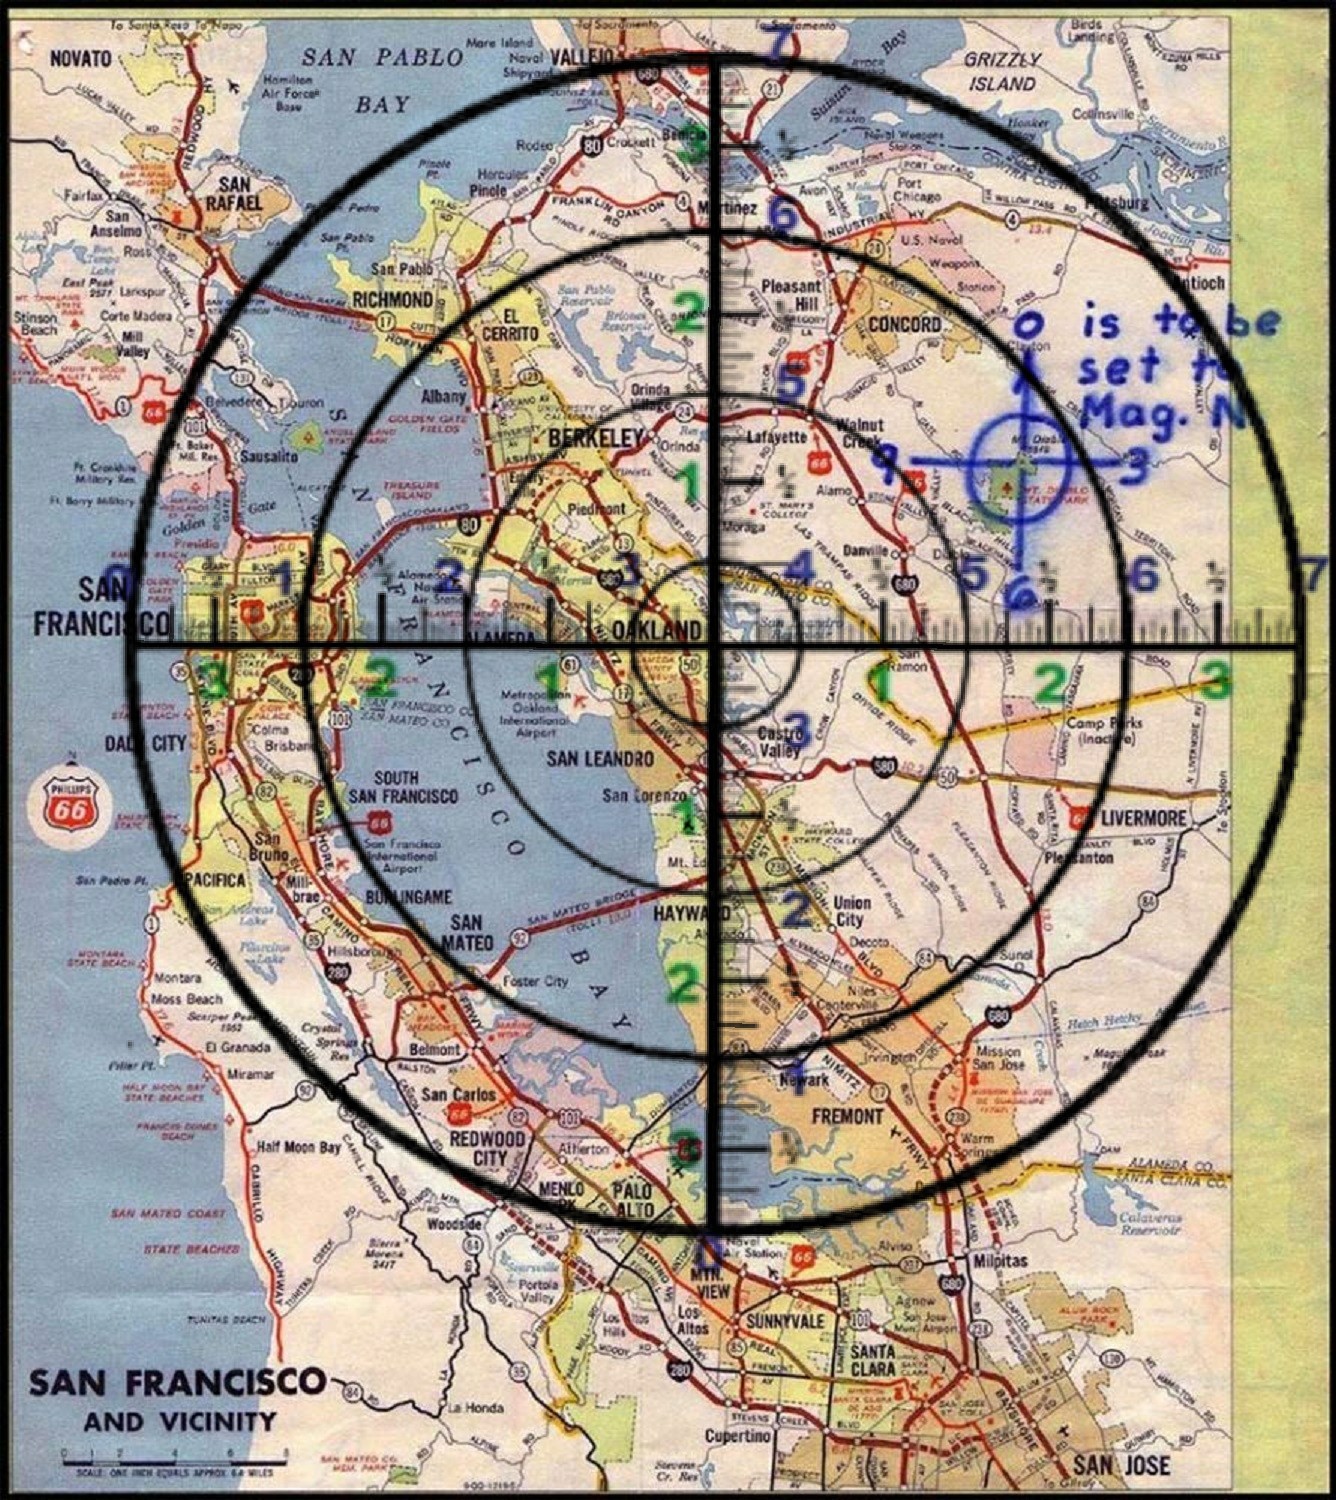
In short, here is one radian on these models. Every circle radiating from the center or point of origin (no matter the size) is still one radian. Each is labeled in inches as per instruction.
Here is a finished, clean model. This is similar to how gun sights work. We have a sighting chart found by Richard we will add in here when we polish this article that will help everyone to understand better. Now that this part of the project is completed and we have a firm grasp and understanding, the next step to convey that understanding to others before beginning the next phase. Figuring out exactly what the hell these are used for. we work in real-time. You find out as we find out. And if this helps one of you to figure it out before we do, let us know. We will add it in and give you the credit. that is how it works here.
Here is how we came to find what we have just shown you. We repeat we hope to polish this article as soon as we can now that it is completed. In hopes of dispelling any remaining confusion about radians and what they are. the next step is what they are used for. That is why I have been learning all about navigation, trigonometry, and all that good stuff. Really, all that matters is that we have found them and labeled them with inches. that is the first step to figuring out...why... I truly hope this helps someone.
So........now it begins
Now that I have a better understanding of radians and have my equipment going "barely" I am going to label the inches of the radians on the Phillips 66 map sent by the Zodiac killer. I am not sure what they are used for but I have a few possible ideas. I think they are either for finding a place or maybe spelling something out. We will worry about that later. For now, I am just going to mark the radians and label the inches. This will be finished sometime soon. I am working on several projects and I post what I do as I go along with each. So I have to create the posts to add my work to.
This article is not going to explain the why's. I have articles that do so if you run across this by accident and wonder how I came to this, then you have to read my other articles. They explain it in detail. In this article, we are just going to do it. It is something I have long waited to do. It is a continuance of my radian map posts. I am going to mark the radians then mark the inches.
What they mean I will leave to others to figure out who hopefully believes in me enough to think I am onto something. Some things are just out of my understanding but I may have a few ideas to add along with source and relevant information for the job.
If you are a Zodiac hunter and looking for something new or a good lead then here you go.
I am making this a priority post. I am going to be making brand new models for this project.
If you just ran across this by accident and want to know how I got this far go to the main page and read sections 1 - 8. Click the link below.
Click here
First...all the tools I need for the job.


Below in the main model, I am going to use for this job.
I will mark the what I believe are the radians
making a brand new radian overlay and then overlay
some tools on that marking the inches along with a few other tools possibly.

Here is the first one I did, but I did not label the inches and the Circles are not exactly perfect but they are close. I did the best I could and at the time I was learning. Now I have experience and more knowledge of radians but it is still important and is a great study model.


The new models will resemble that but it will hopefully be exactly accurate and label the inches along with a few other things.
Again here is the blank model for the job.

The final tools I will need for the job and a couple of sources related to this project.
The main tool labeling the Radians.
I made this myself and saved it on another article for the plans
of doing this.


A few more tools that may be helpful.
I used one of these in the ROTC map reading class.
We used another kind also I will find and post.
It was square.


Some source info relevant to this.


I scanned these straight from my trigonometry book from that era
It was used by people going into military service
(thanks dad)
These are the same as the images above more info and detail
From this book and I still, have it for more reference if needed
I have a few modern toys for this project also
I'm going to prove this
This deals directly with radians and also shows a grid is used
like the 340 code
I cut this page out of the book so I could scan it straight. I might use it as a tool on this project
Quadrants
pages 68 - 71
Functions of Quadrant Angles


That is all the tools. Now I can do the jobs.
Here is some new material and models I am creating
I have to resize these
I had to resize some of these
I am working with some new stuff
High Rez 1200
High Rez 2500
Rez 400 for all three

rez 800
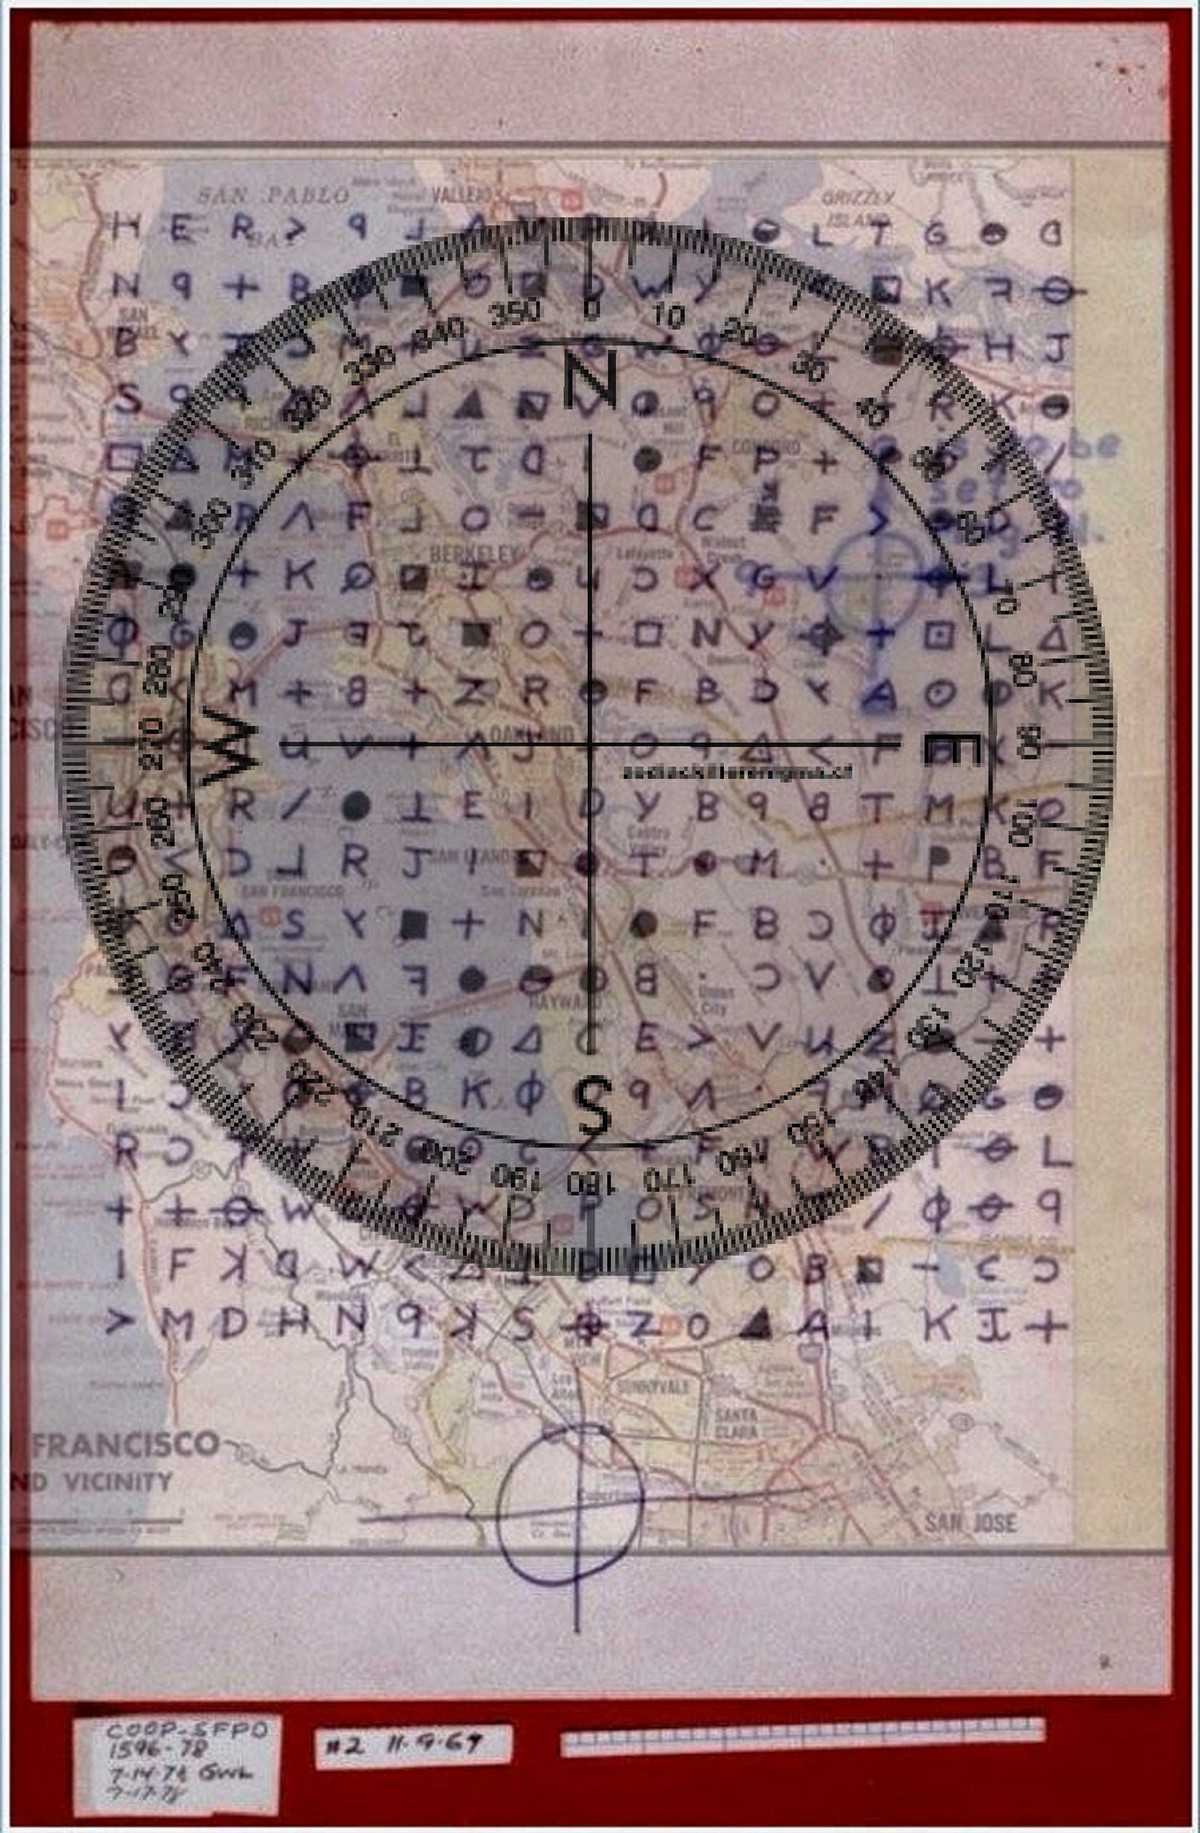
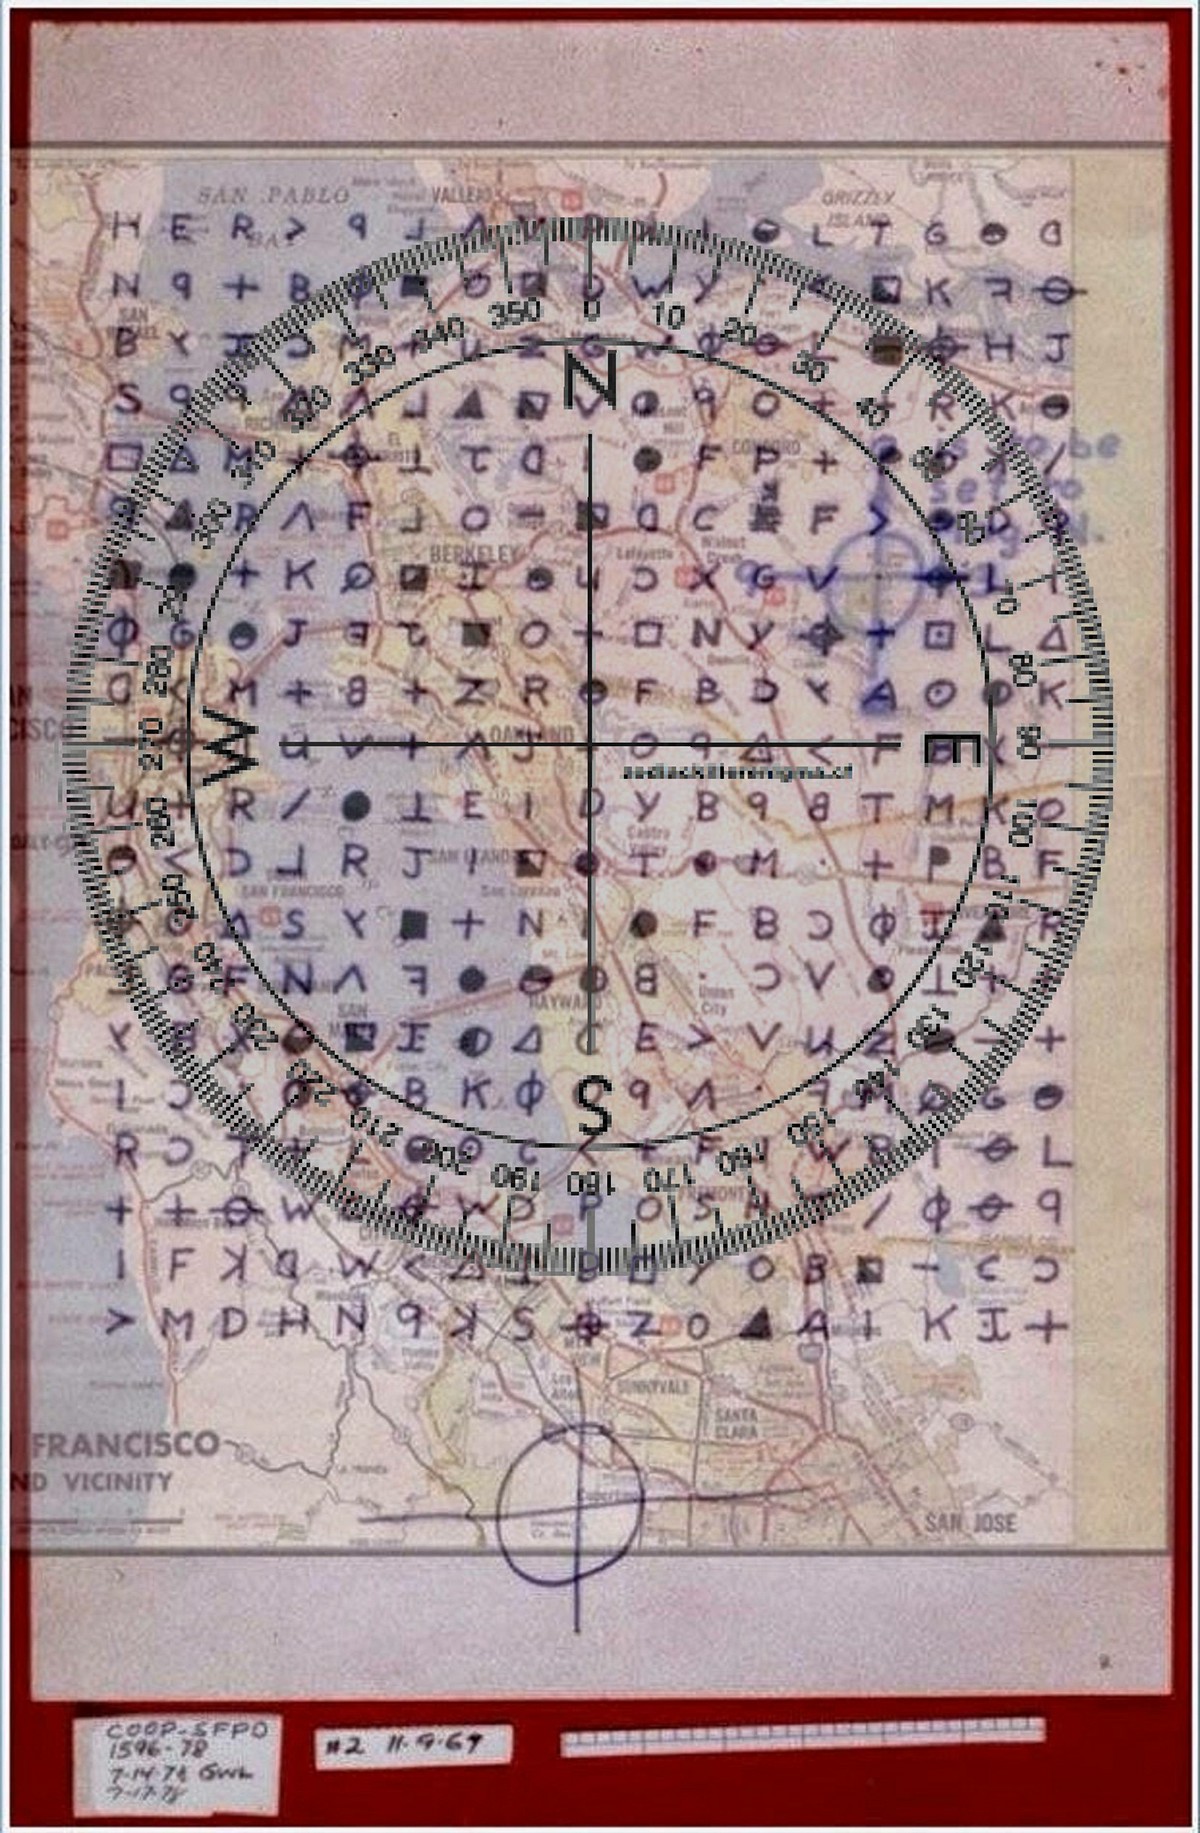
Here they are. I still have a lot more work to do. I have to check the measurements and refine a couple of things. Then I have to make models of just the map with the 340 with the measurements and radians. I am also going to apply all of the tools I have posted above to these models. I am going to make models, models, and more models. Then I will think of what comes next or maybe someone reading this will know. Til then the work continues....
Like I said I still have to check these for accuracy and I am very tired. I think I am good though ..if not then they are close but I will check it tomorrow and I will check them against my other measurement. I will apply all my other tools to this and I will also label the circles in inches..then we get to apply some math to these models. It is all coming together.
Here is the thing. It doesn't really matter where I place my other measurement tools but the one I am using to measure the radians may matter. So since this is the line dividing the center of the grid vertically.
I am using this line to divide the code horizontally.
Because of these markers
So the grid is divided into four sections or quadrants like this.
So the plus symbol of marker is the center or point of origin.
Since a line or symbol divides the code vertically it makes sense that a line of symbols would divide the code or grid horizontally. Plus you have the added evidence of the plus symbol suggesting this in the center and the two horizontal slash marks on the beginning and end of this line of symbols. I only point this out because this could also be the center or point of origin of the grid.
Because it divides the upper and lower section perfectly in half but it doesn't fall on a row of symbols. I think the tenth line is the dividing line and the 20th line is filler because he signed his name Zodiak at the end of it. The triangle is the symbol for delta or D. It doesn't really matter as they are both basically in the same place and if I made the lines of my measurement model a little wider it would cover both, and if you were supposed to find a specific place by measuring the radians it wouldn't really matter as a map like this is just supposed to point out the general area. I just want to explain all of this to everyone but being a stickler for preciseness I will make models of both before I am finished just to be sure. That being said both are so close together that in the end, it doesn't really matter. Still, I will create models of both.
After I finish this project I will rewrite this entire section and organize everything putting it nicely and neatly in order.
So here is where we are so far.


This one is a little more accurate
I will be making a lot of models and in the end, choose the best examples.
I still have to measure these for accuracy but I think they are right on the money.
Darker

I took this grid from my trigonometry book and overlayed it onto the 340 cipher map overlay.

I aligned the point of origin with the point of origin on the 340 map overlay.
The arms extending from the point of origin align with the dots on the 340 map overlay almost exactly (like in the models I created before and shows my prediction is correct) so I can assume I am correct in placing my models for radian measure in the correct place over the plus symbol. I am going to be making many models with many different tools for measurement other than radian computation. I created this model because obviously since we are dealing with radians we are dealing with trigonometry and the techniques in my trigonometry book will come into play at some time. The dot in quadrant one (lower left quadrant) was not expected to align in this diagram because it is more centered. I have grids posted that show a broken dotted line and this dot is expected to align with one of those. I know have confidence that I am right on the money with the point of origin and more models with the point of origin just a hair lower will not be needed.
When I have completed creating models with my tools superimposed onto the 340 cipher map overlay I will create models with the same tools superimposed onto just the map alone.
The line in the 1 quadrant should fall on one of the center lines like in the diagram below.

I am going to try to apply most of the tools posted above to these models.
================================================================================================================================================
exported
You might wonder why I have so many images posted that look just alike. Well, they are not all just alike. I am trying to get the best model I can with the most detail and it is a process and more work than you would think. I stress that when I am finished most of them will be deleted and I will keep the best.
================================================================================================================================================
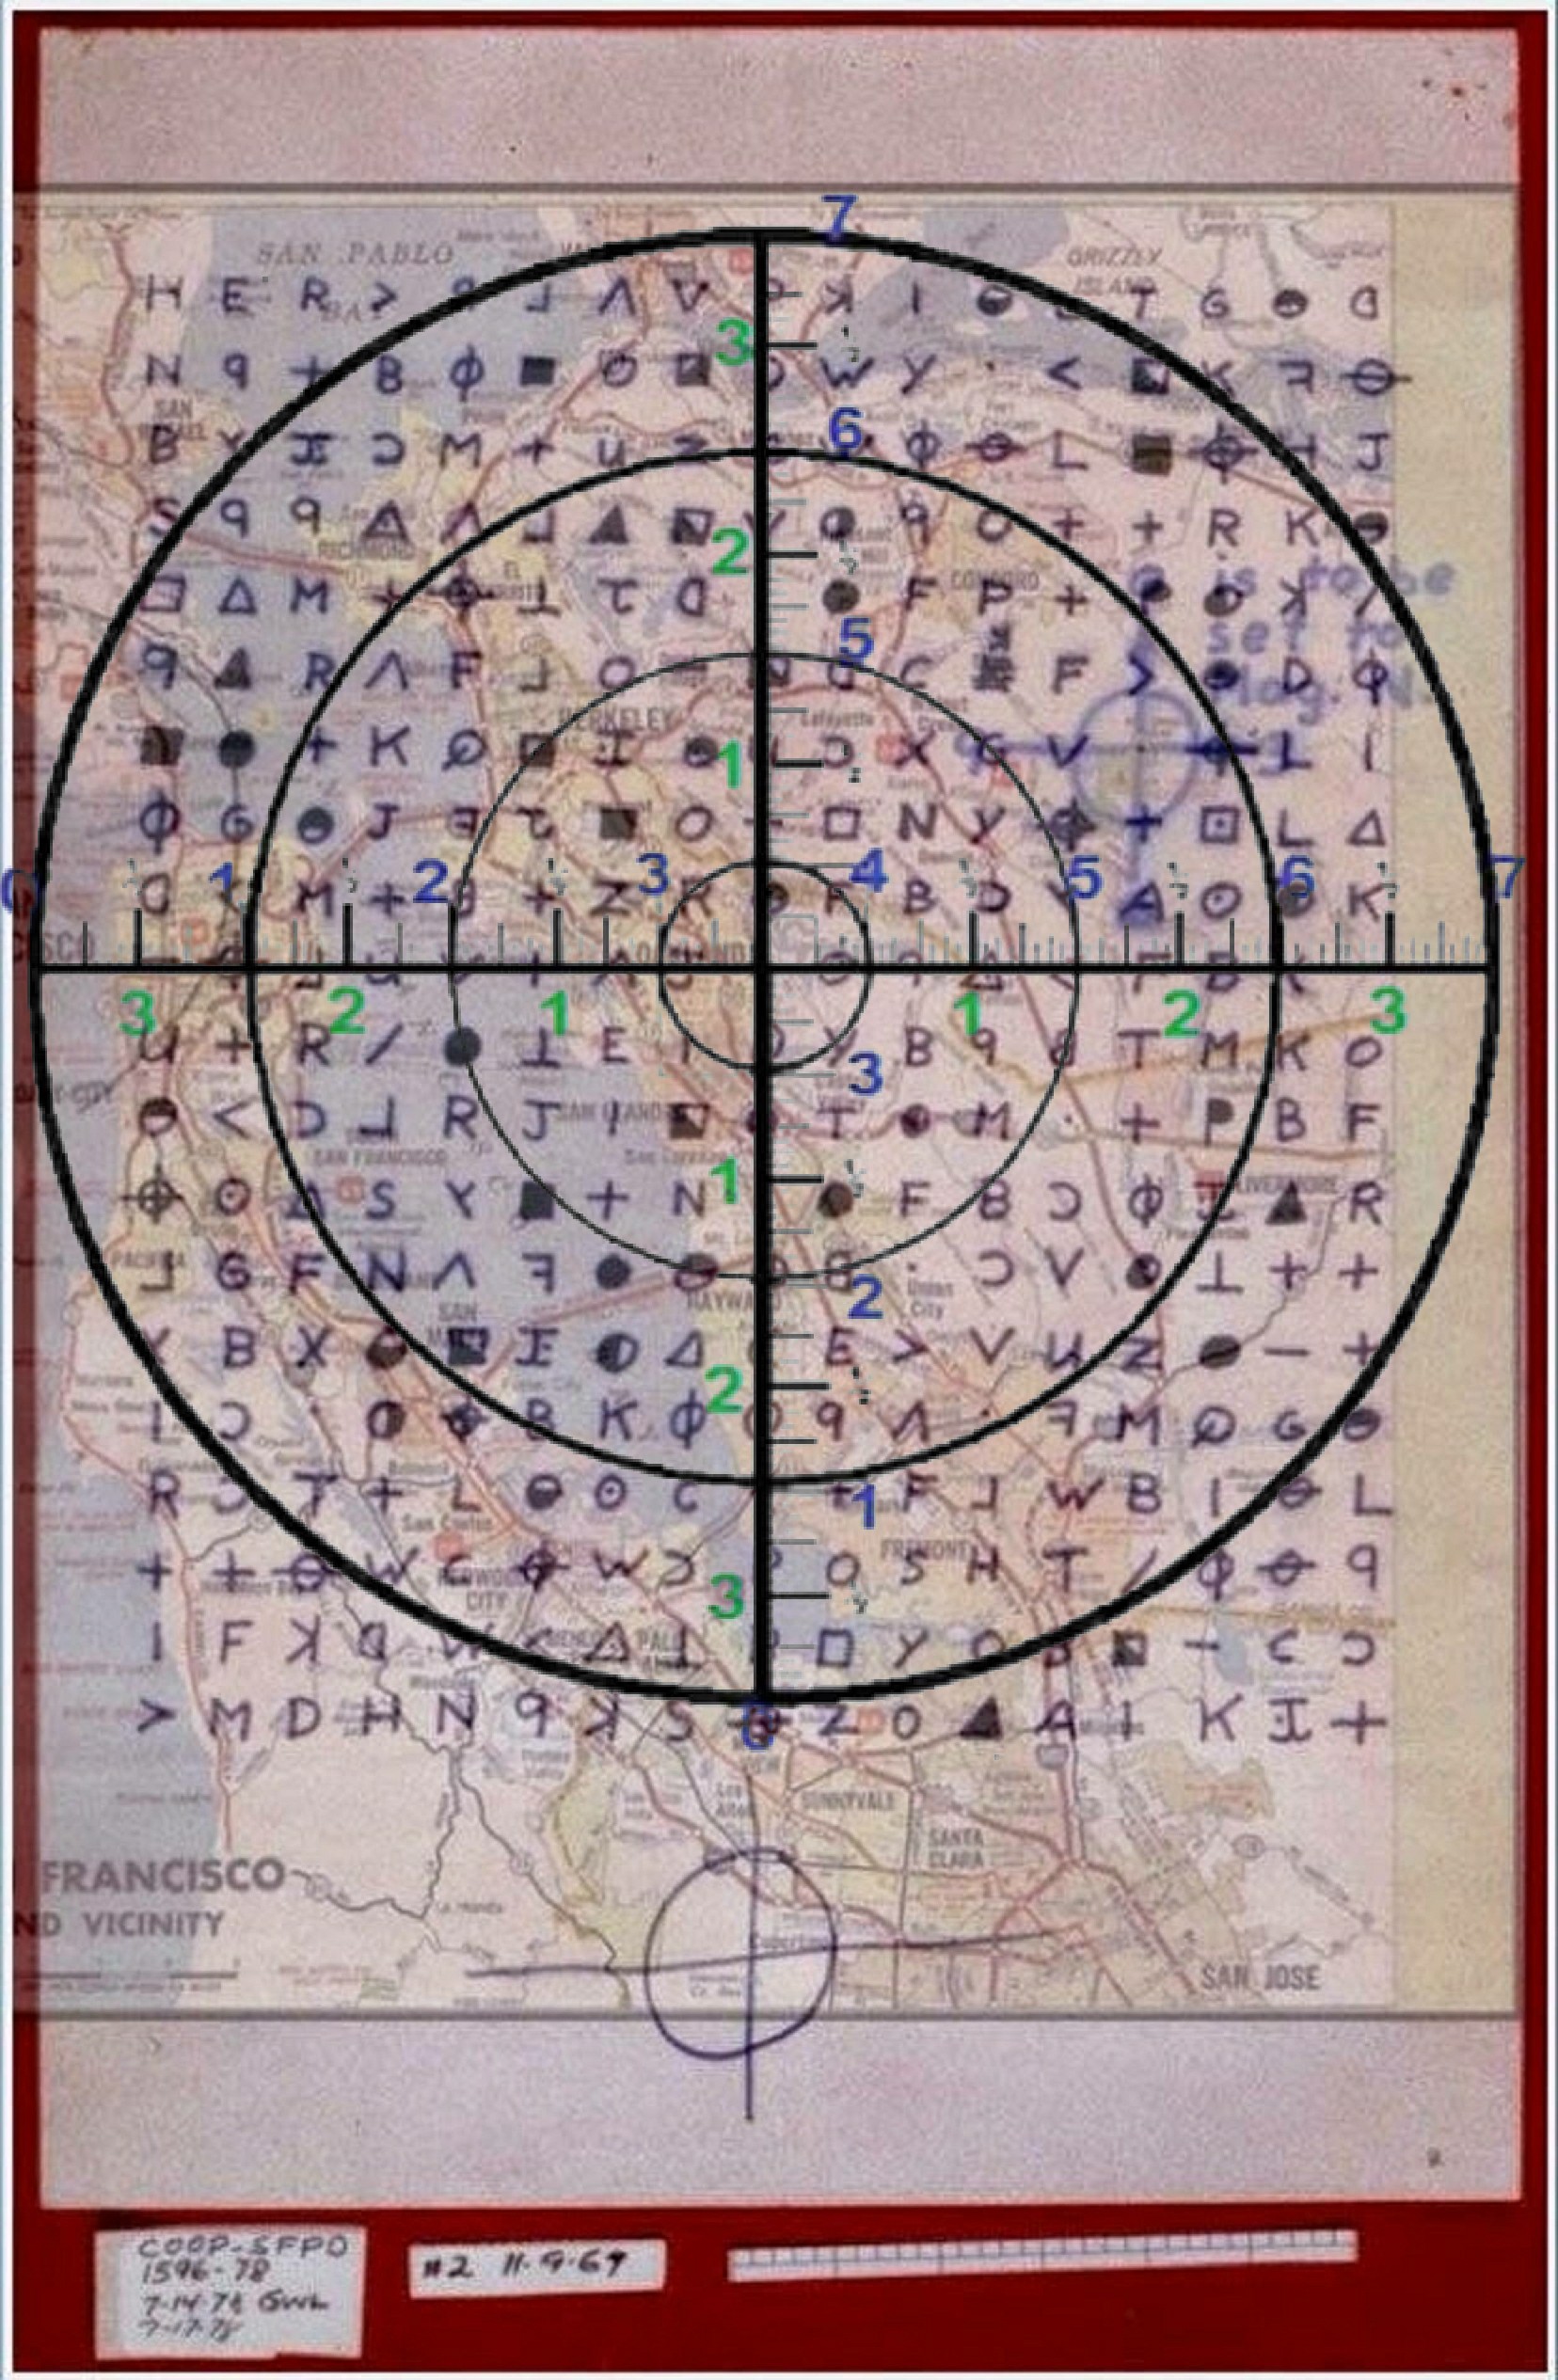
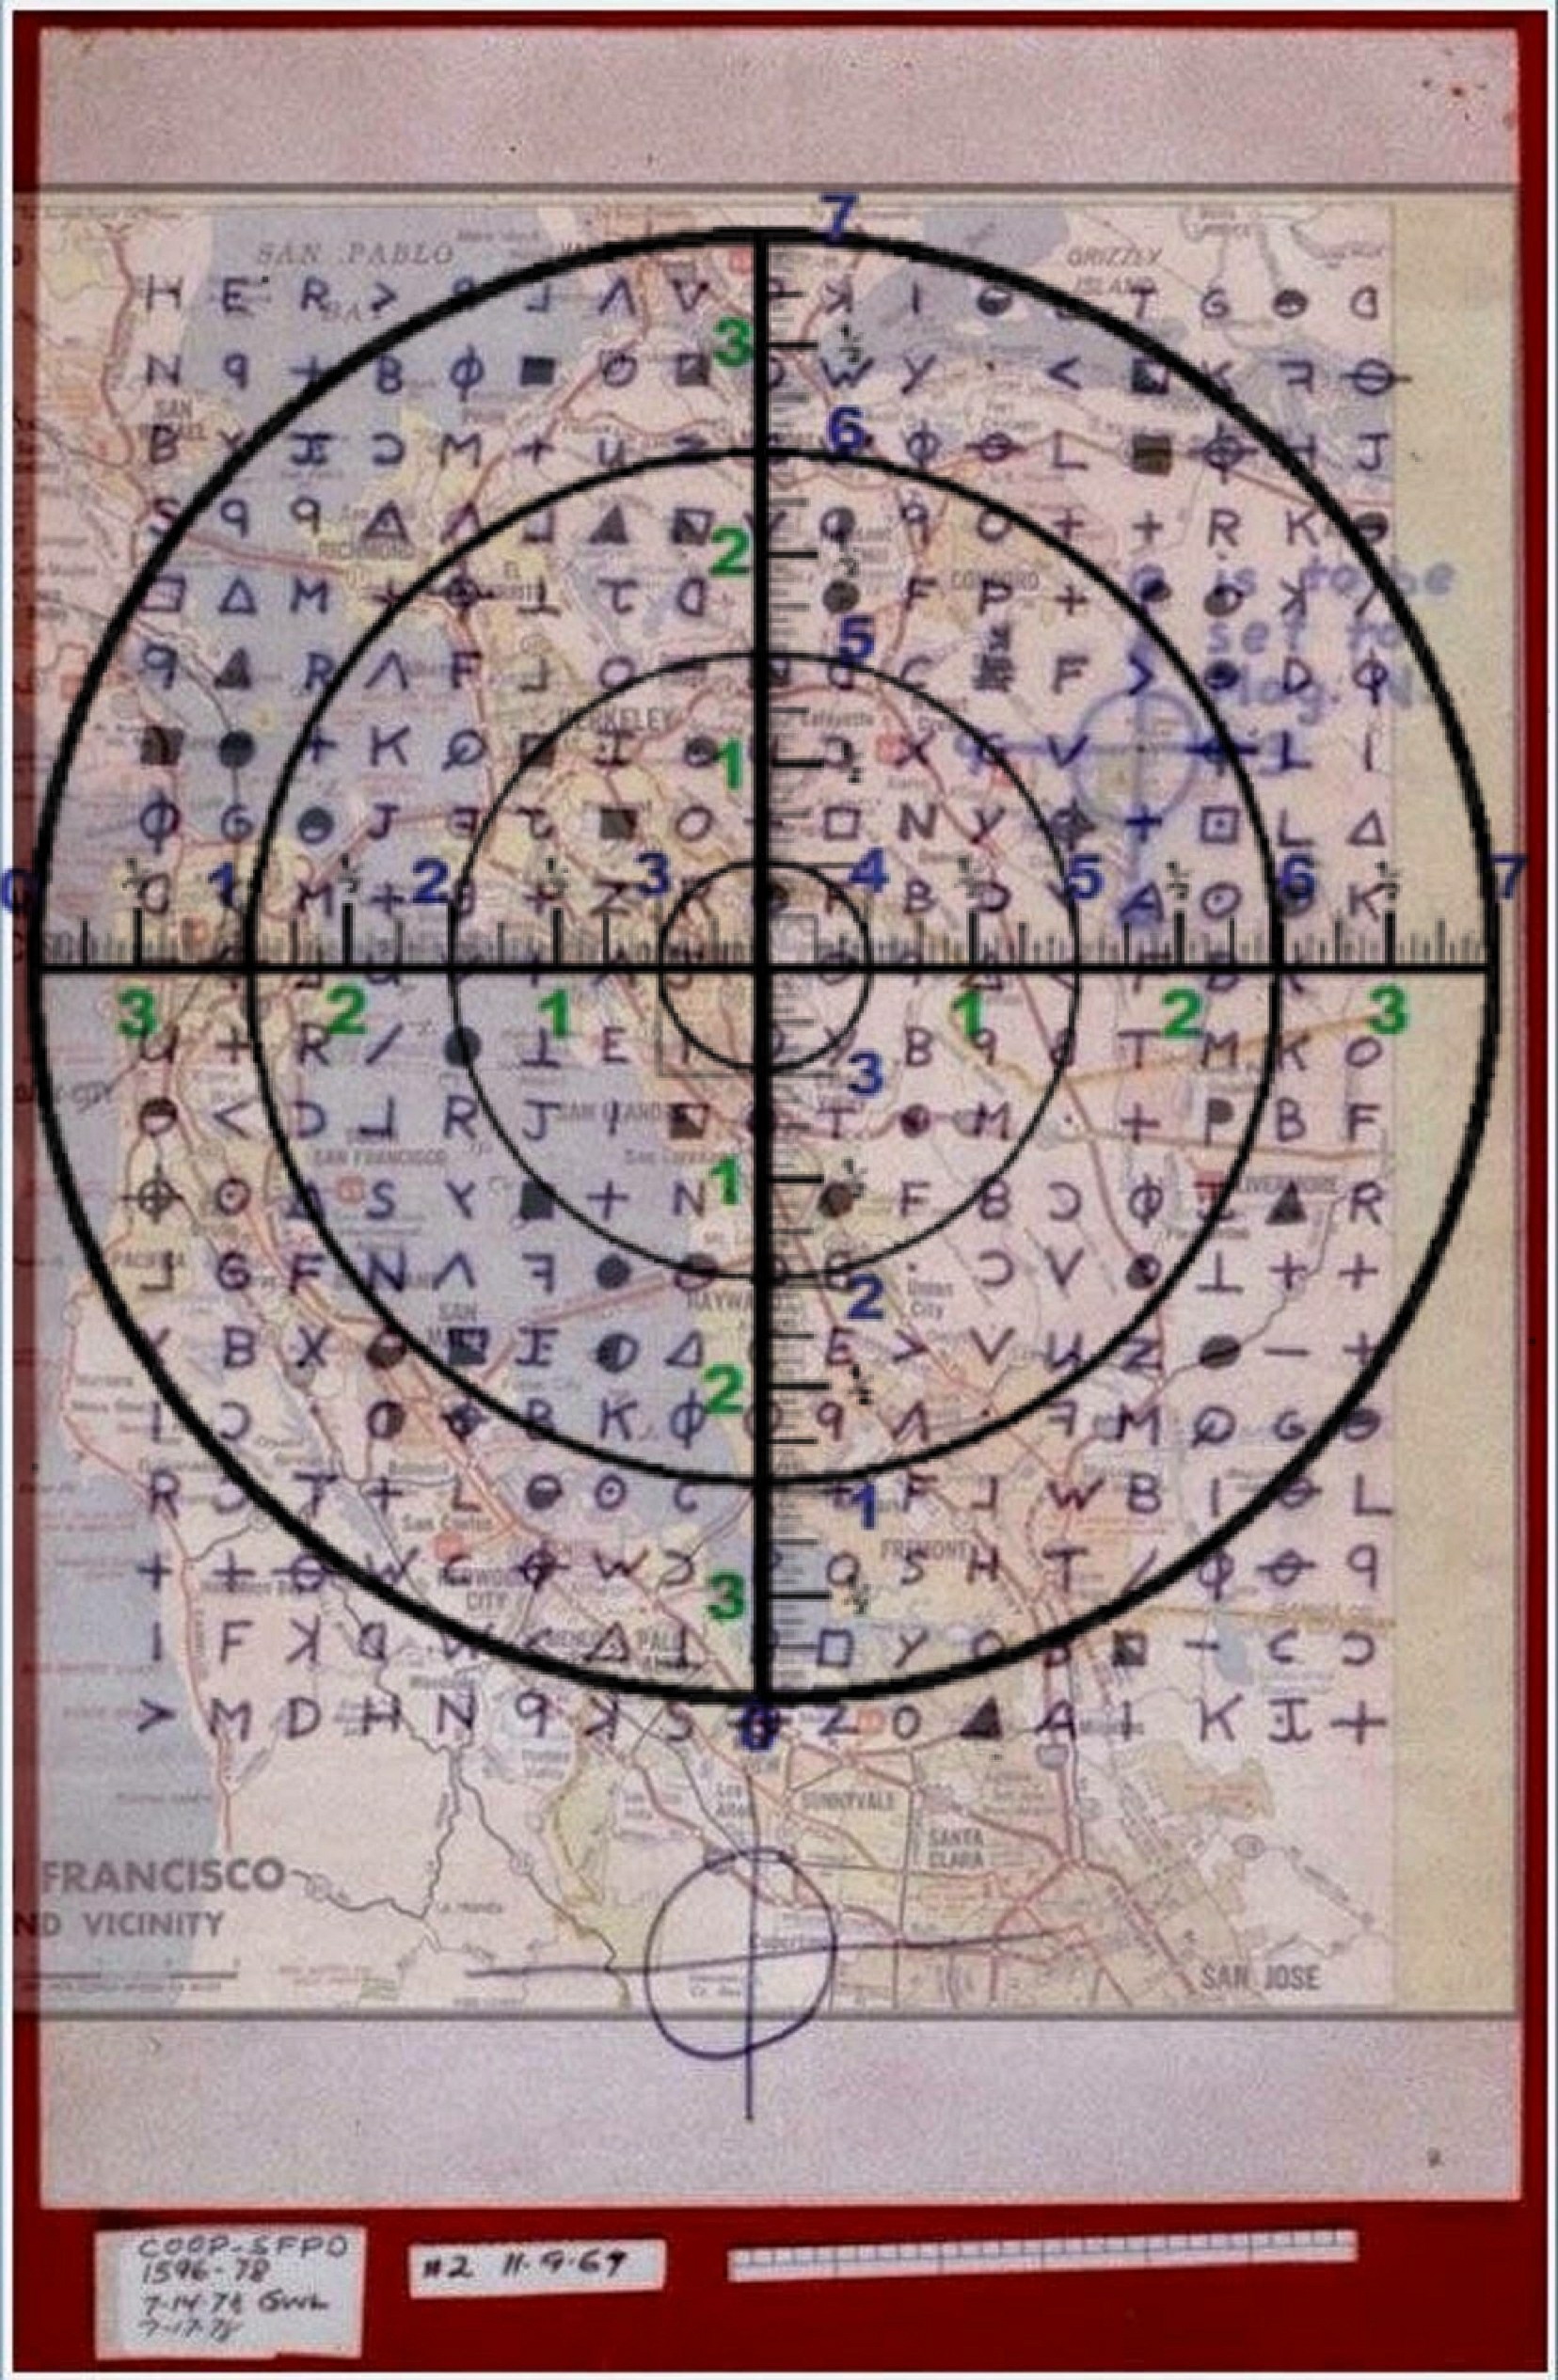
some of the models I make are just experimental and for study, comparison, etc...., The way we are going to measure is the way Zodiac hinted to. We are going to use the 340 as our grid and the radians with inches. So I have to make map examples with just a black grid the same size as the 340 for study and I also have to put radians with inches overlay measurement tool directly on the map with the 340. so that is my next goal.
Here is a high rez image of the Phillips 66 map as sent by the Zodiac Killer.
1335 x 1500
Zodiac Map
Resolution
pixels
inches
========================================================================
MAPS
========================================================================
1
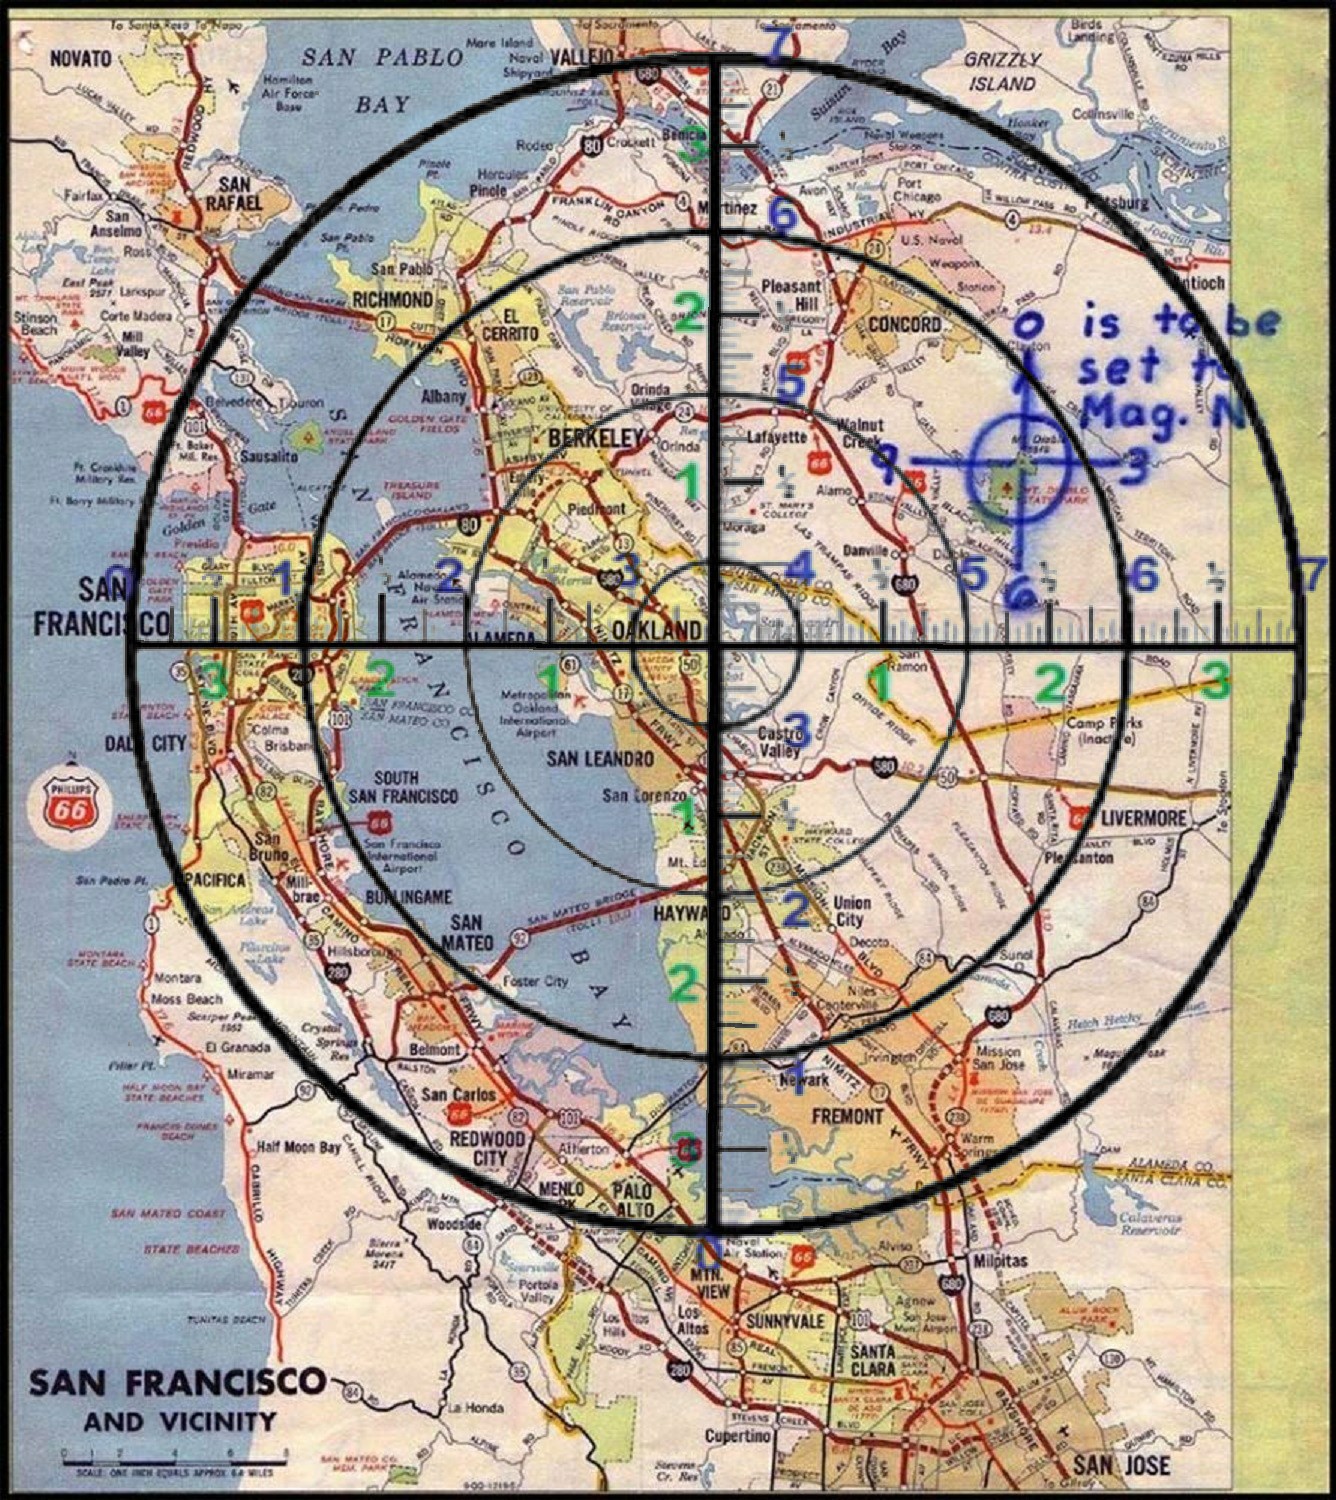
2
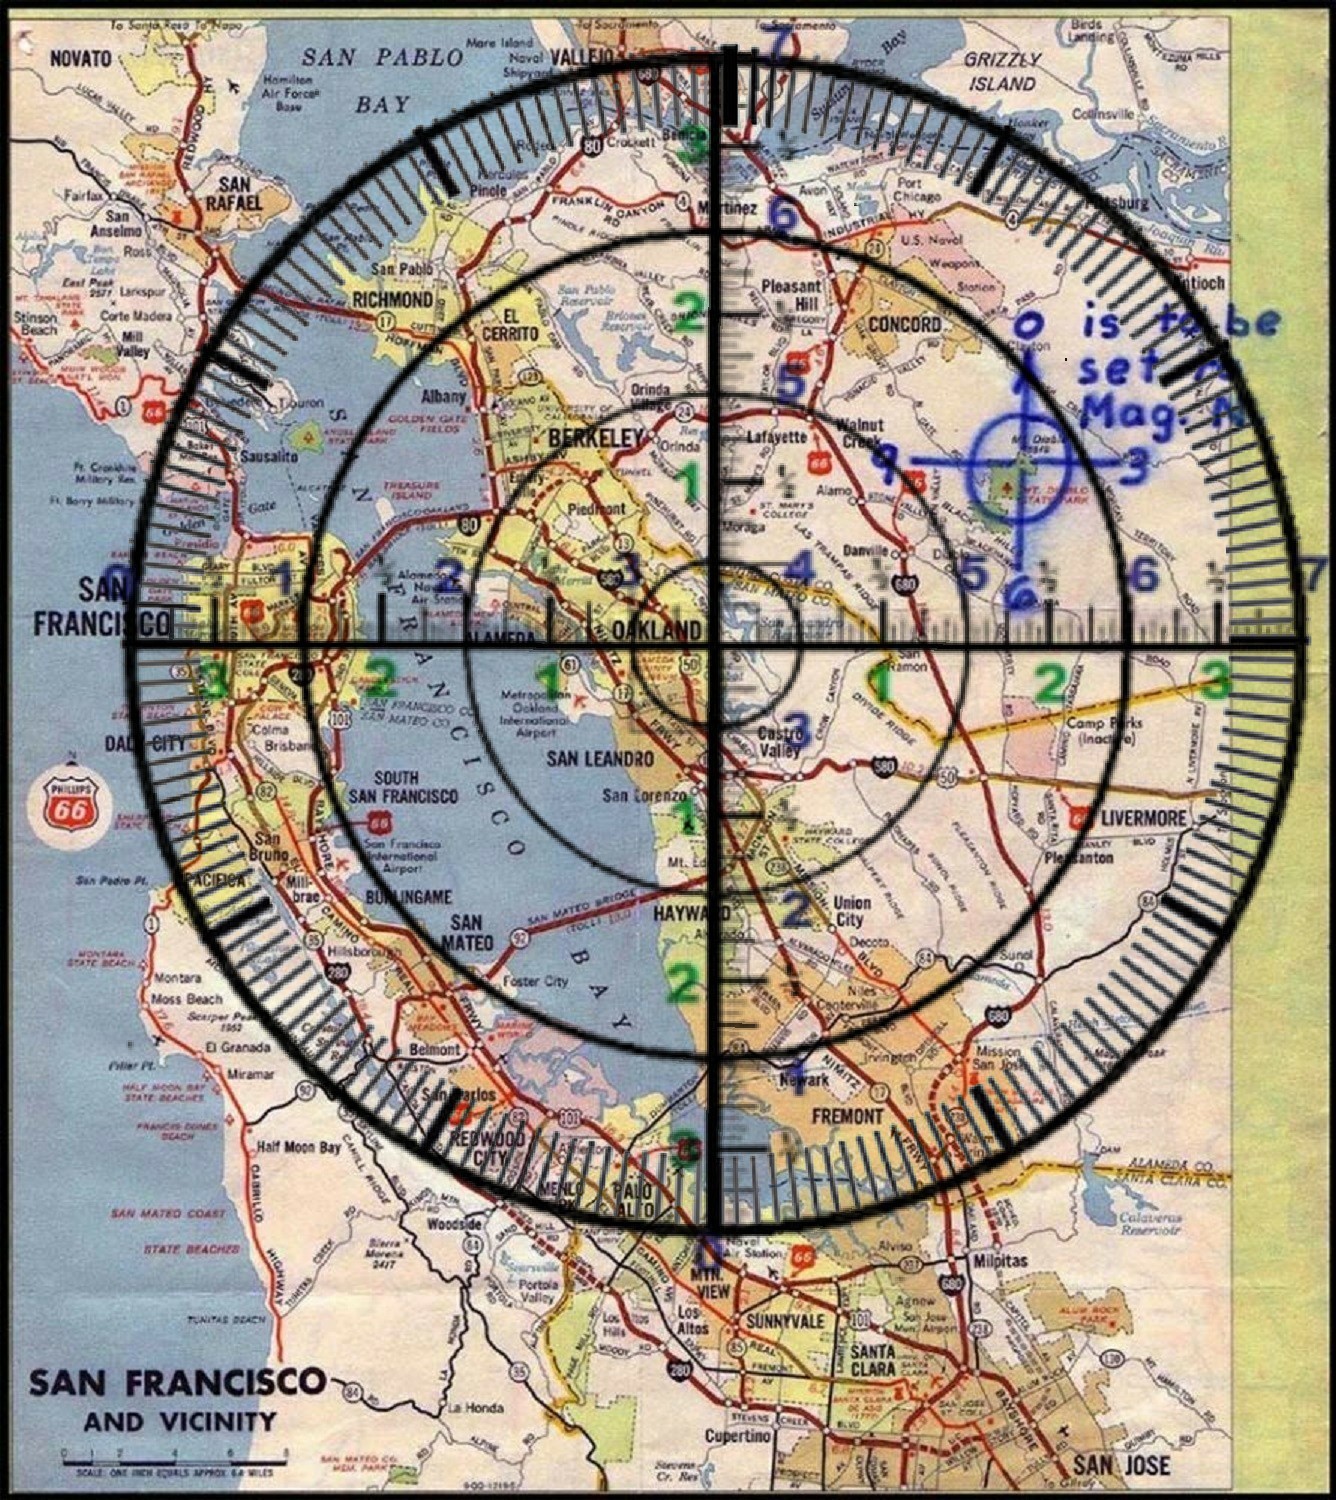
3
4
========================================================================
340 map overlays
High Rez Images
========================================================================
1
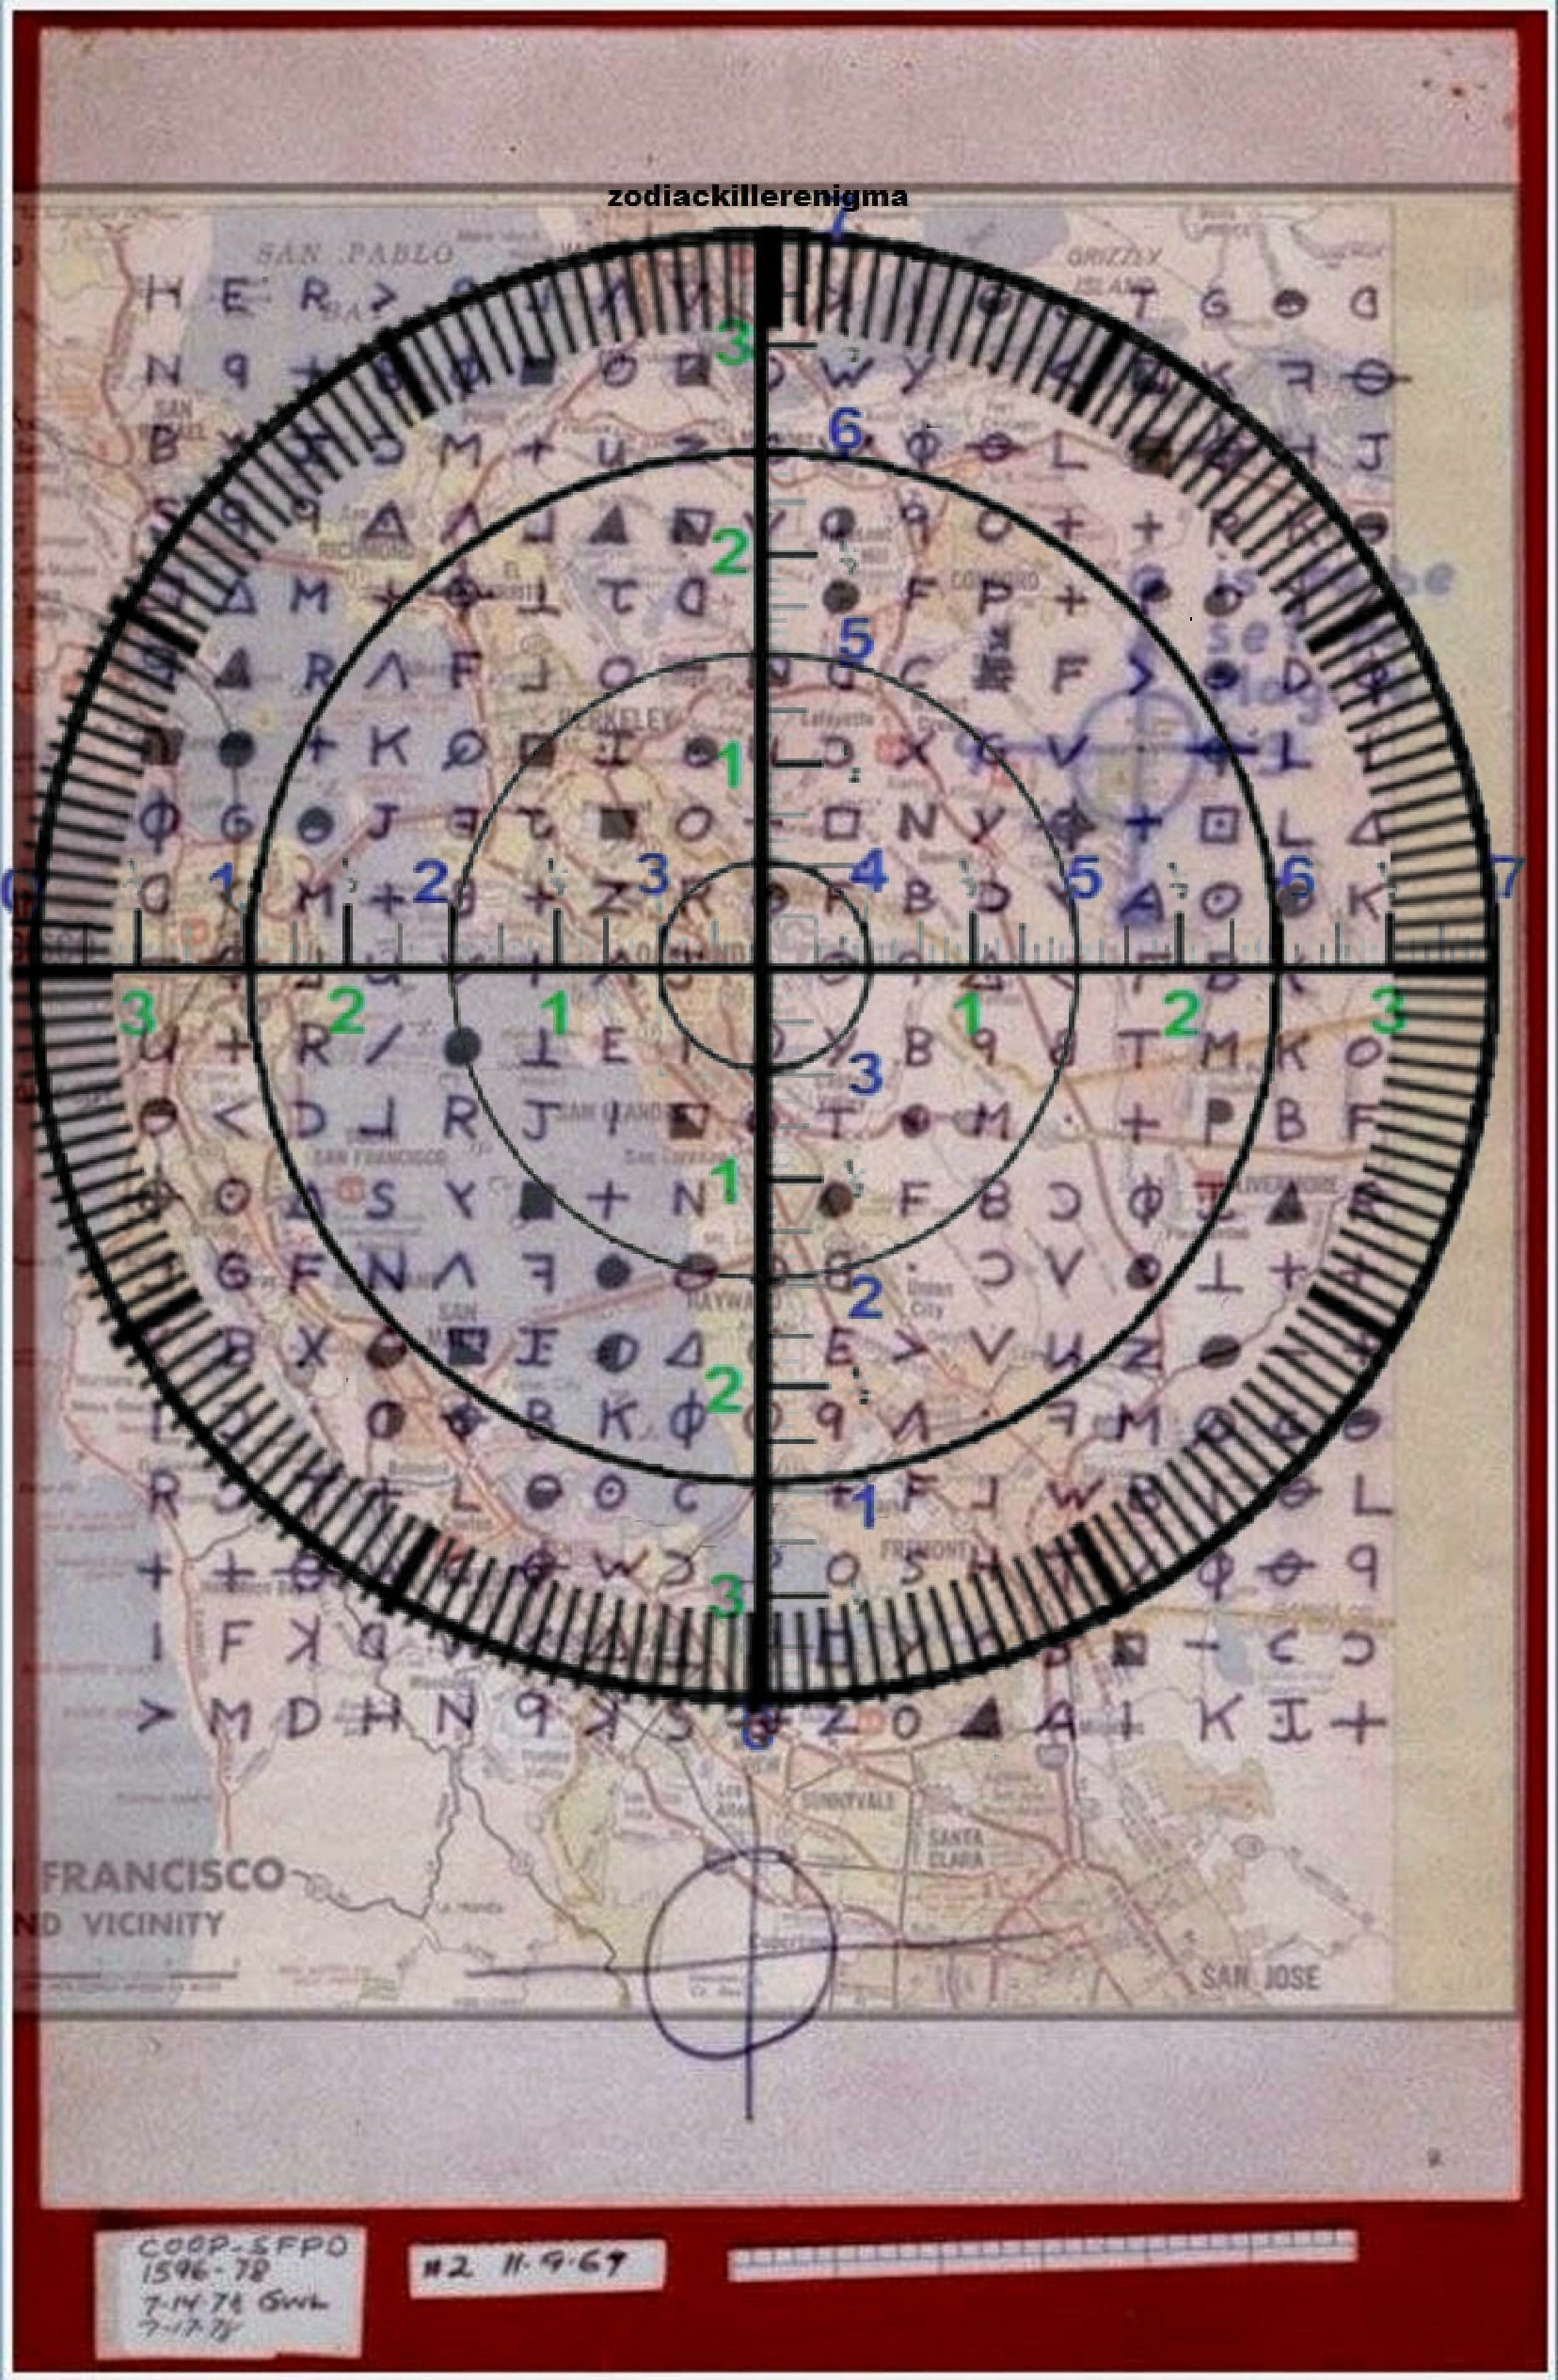
2
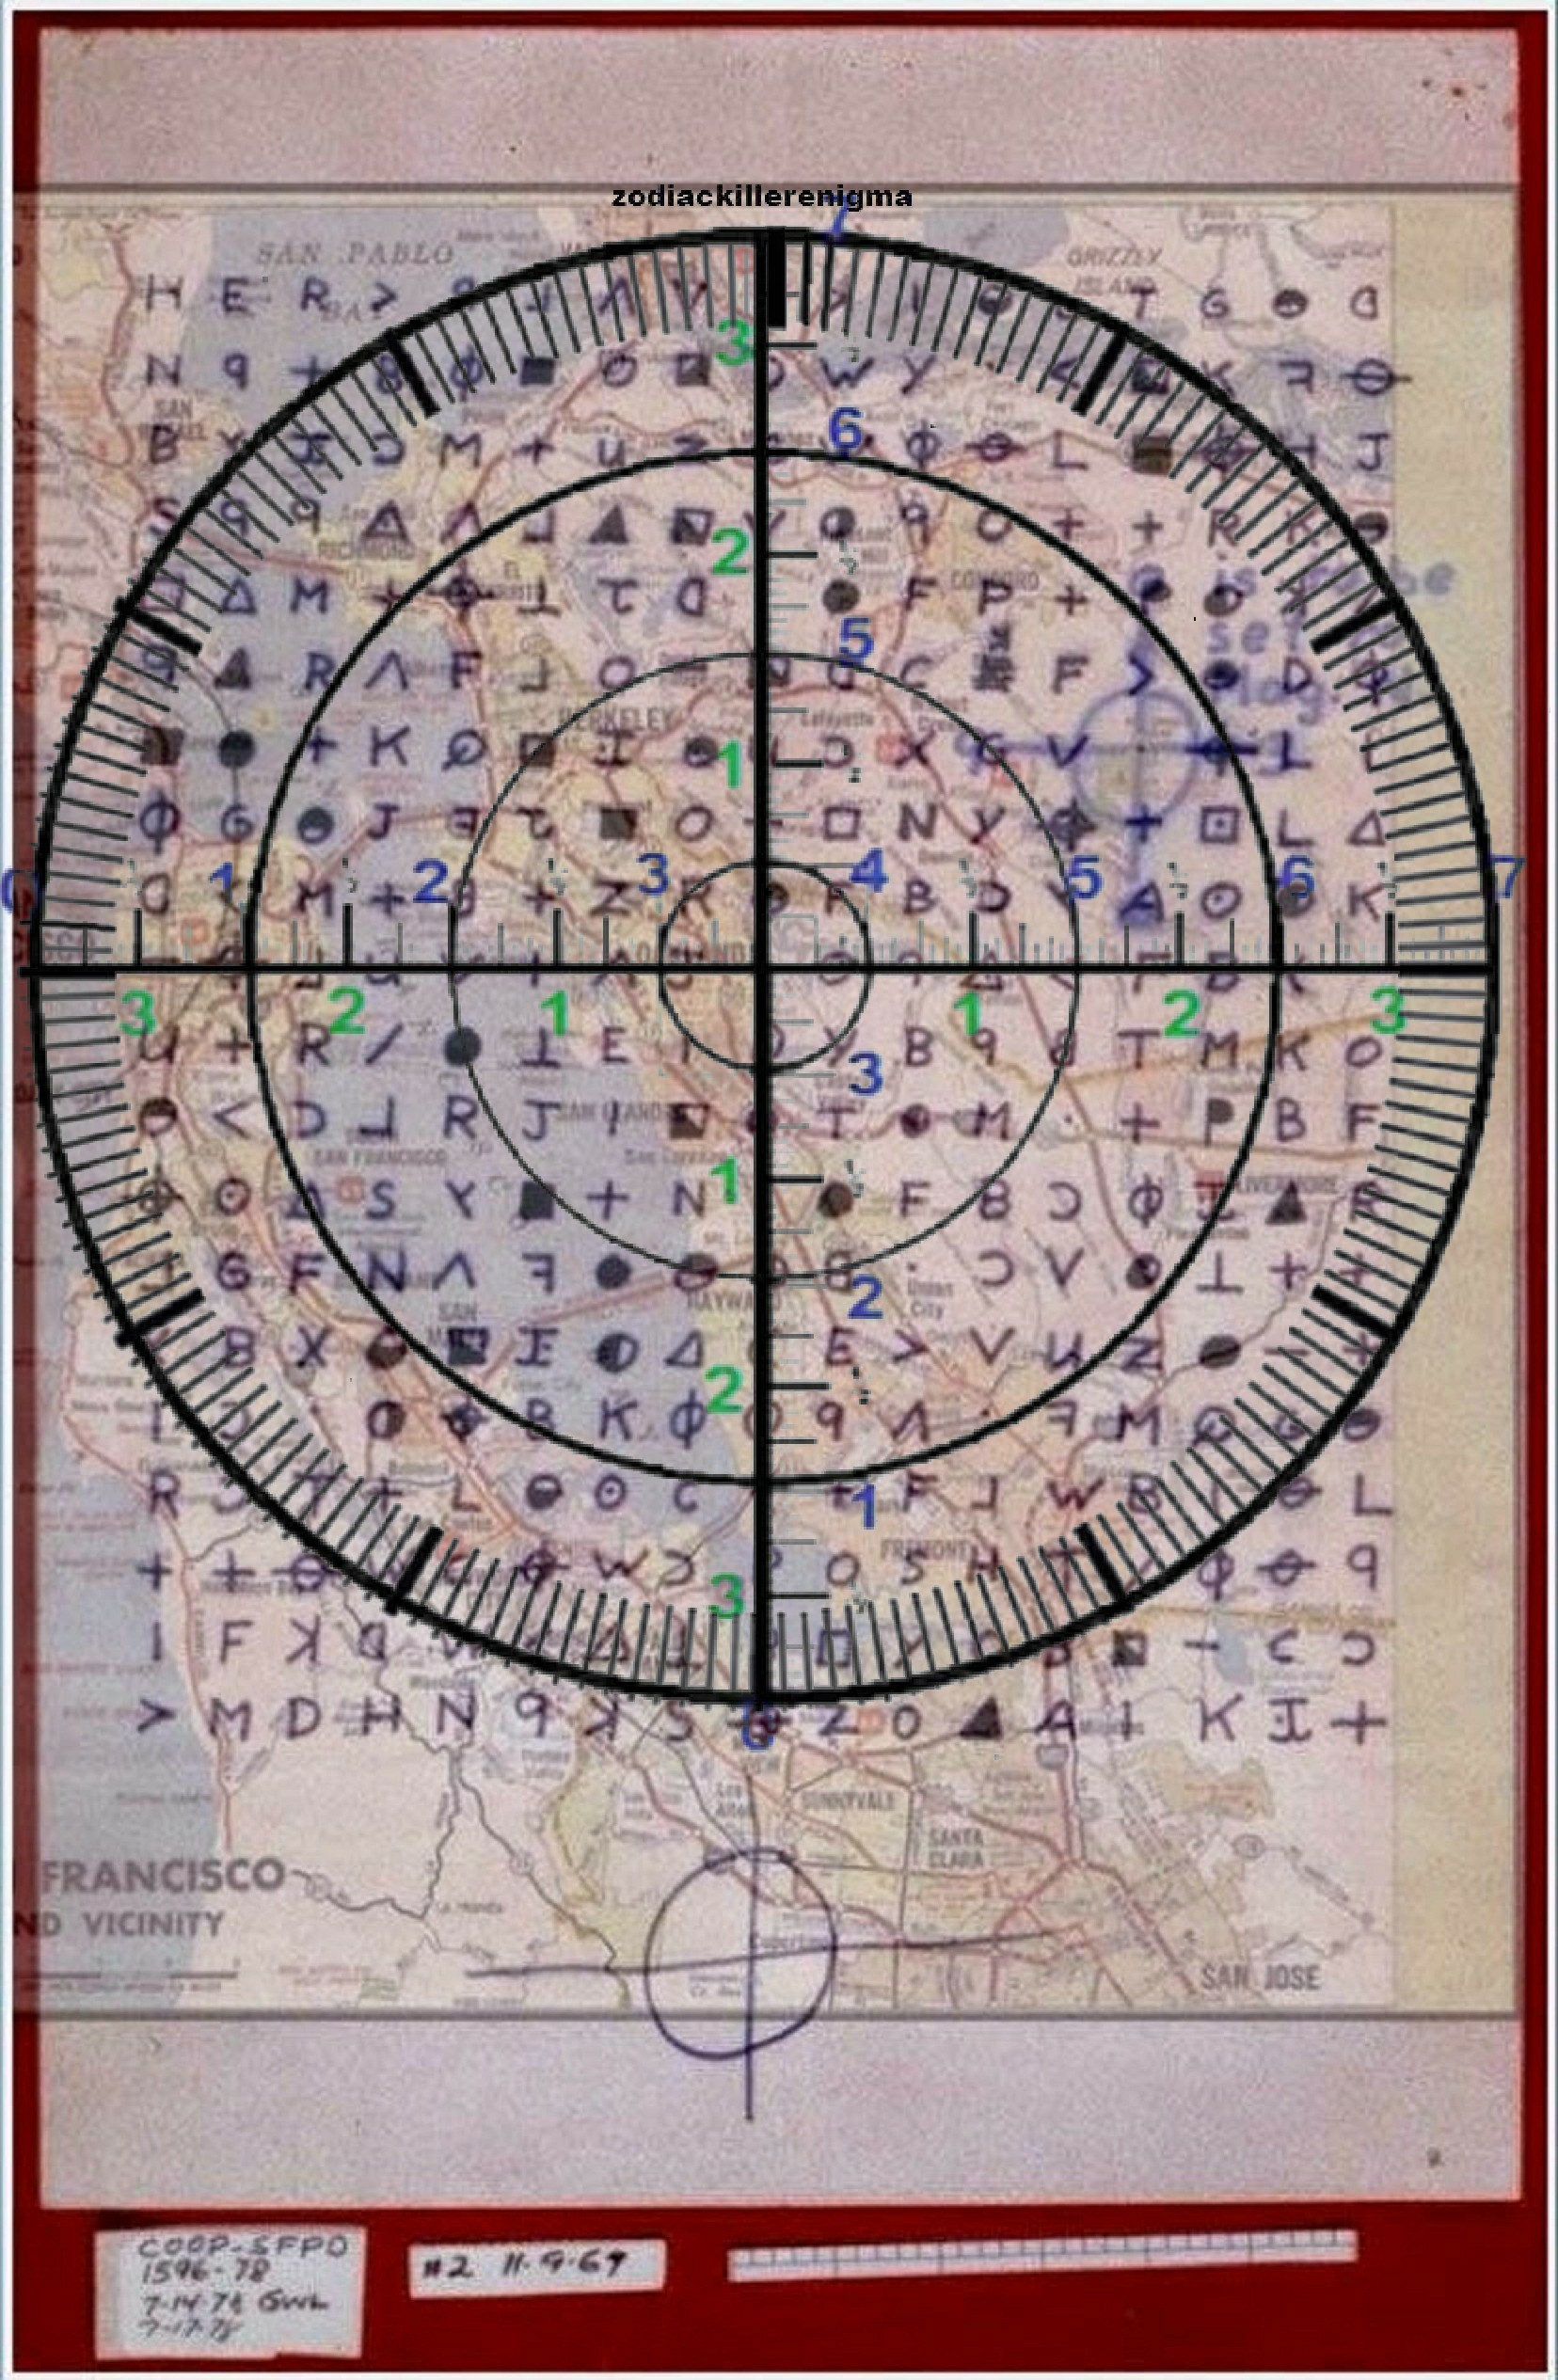
3
4
5

6

========================================================================
End High-Resolution Images
========================================================================
a few more tools
some of th4ese I will not use.
to be continued
There will be a series of these posted here for future use
You have to click on these or open them in another window to see the high resolution
Final model number one.
number 2
number 3
Should print these out and use them for targets...which I'm not entirely sure that's not what Zodiac wasn't doing. As gun sights use a form of radians for sighting the weapon in. We have some more info on that in other posts that we want to add in here also. Till then, check out the update below.
I have learned a lot since I first began this phase of the research project. In my quest to get a firm grasp on radians and what they may be used for. We only have a few possibilities. I want to begin with a few images for use later and a few notes. Once completed, I will rewrite this article.
One way radians can be determined is by the angles in a circle. Another is for example, how they are used in the sights of a gun. This update deals with radians in a circle.
A radian is always the same no matter the size of the circle. Think of it as a type of equilateral triangle.
I found this out after I started this project but with the models, you will see shortly, this is one radian. Keep in mind, I am only pointing this out for notes. We are not sure yet where exactly this is going and we have a couple of other options to explore also.
It is not fair to say that when dealing with angular radians, that 57.3 degrees is equal to a radian, even though that is what we are going to say in order to avoid confusion. That would be like saying pi = 3.14 when pi goes on into infinity basically. I only mention this for the people who are high strung about things like this. 1 radian = 180/pi which will always work out to be 57.3 (approximately...) no matter the size of the circle. Look at this example again. All three of these sides are equal length to one another and this will hold true no matter the size of the corcle or object. This is called a "theorem" (For those who may not know. Like 2 +2 will always =4. That is a theorem)

In the models, you are about to see, and I didn't discover this until long after I had created these models (which makes me feel really good about it). This is one Radian. I found a protractor app that will let you measure anything with a camera and convert it into radians. I will make a more presentable model of this later. For now, it is just important to make a note of it.
I just want to add a couple more that will be useful when I clean everything up. The cool thing about my work is that I do it in real-time. You find out, as I find out. It just takes time but we have come a long way since all of this first began and found some actually important stuff. we are the only place who does it like this, but we want people to witness everything.
I need to find a star chart for 1869 and 70 to overlay onto this model in an experiment. I know this probably has something to do with finding a location with longitude and latitude. Something like that. I know from the hints there is probably some way to use this model with some kind of hidden coordinates to find an exact location. that is just a guess but everything points to something like that. For example.
note to self.... look up what could twist a shoe to see what references I find.
unrelated to this post ..forensic files is on... I hear them say these kids were attacked in a lovers lane but a man 6 foot tall 190 pounds with dark blond hair and spoke with a draw. he tied the kids with the hands behind their backs. it was 1957 and then the said California and it really got my attention. I was like wow that sounds a lot like him and in the same state and at the same time. He stole the car and ended up killing two police officers. He rapes one of the girls after he tied them and did some things that were not like zodiac but how do we know for sure. people change but they also listed a lot of things that did sound like him. since I am working on this post I want to make a note of it here. I think I have heard of this crime before. It was solved 5 decades later which shows there is always hope and one of the things that solved it was handwriting. I haven't finished the show yet so I don't know his name but I am recording it. I will def look into that and his handwriting if I can find it,. I will take this note off tomorrow. this is just a note to myself to remind me. pay it no attention. I have to at least check it out. I mean I know its most likely nothing but still....and holey shit the suspect's name is Gerald Mason..mason, lol I still haven't finished the show ...I'm going to bed.
To get back to the main page click the link below
Click here
©2014-2020

View Disclaimer


